

Accessing Projects
- Click “Projects” in the navigation menu
- View your list of projects. Active projects allow for tests to be taken and inactive projects do not.
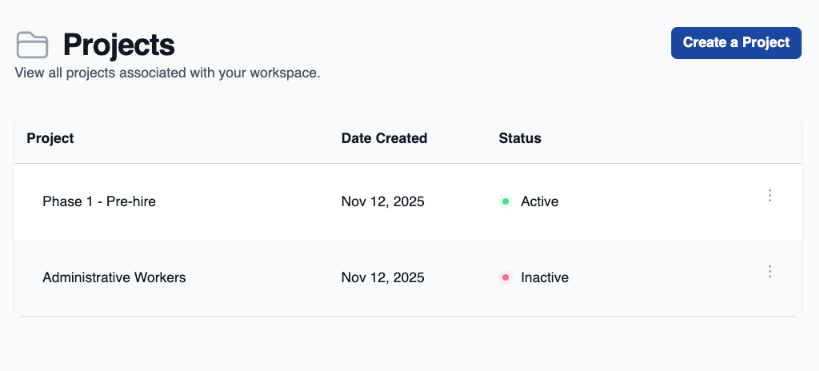
Project Details
Each project entry displays:- Project Name
- Status Information
- Actions Menu
⋮for editing its settings
Editing a Project
-
Open the project, then click the
⋮button in the top right and choose “Settings” to open the Project Settings page -
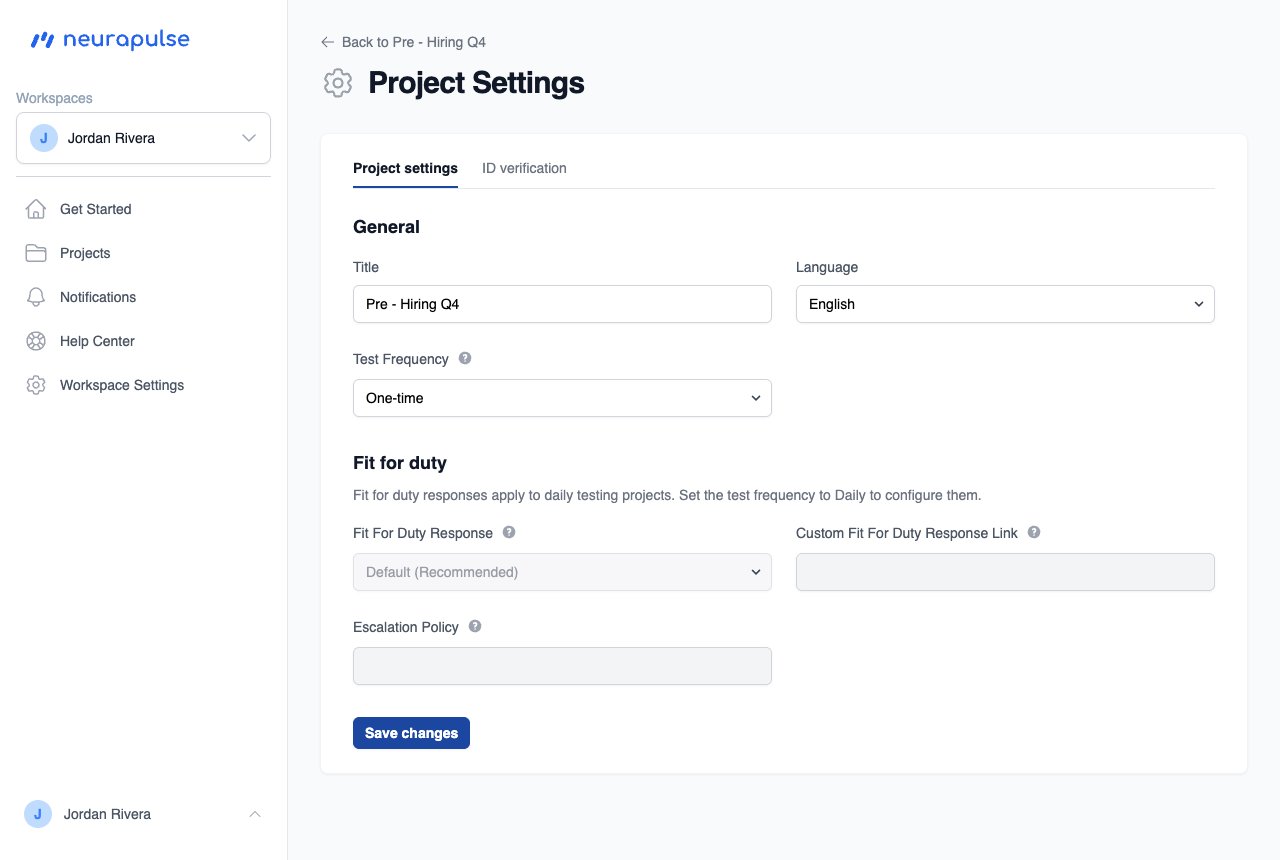
Update settings across two tabs:
- Project settings: title, language, test frequency, and the Fit For Duty response and escalation policy. Fit for duty responses apply to daily testing projects; for one-time projects these fields are shown but disabled.
- ID verification: the identity verification options for the project.
- Click “Save changes”
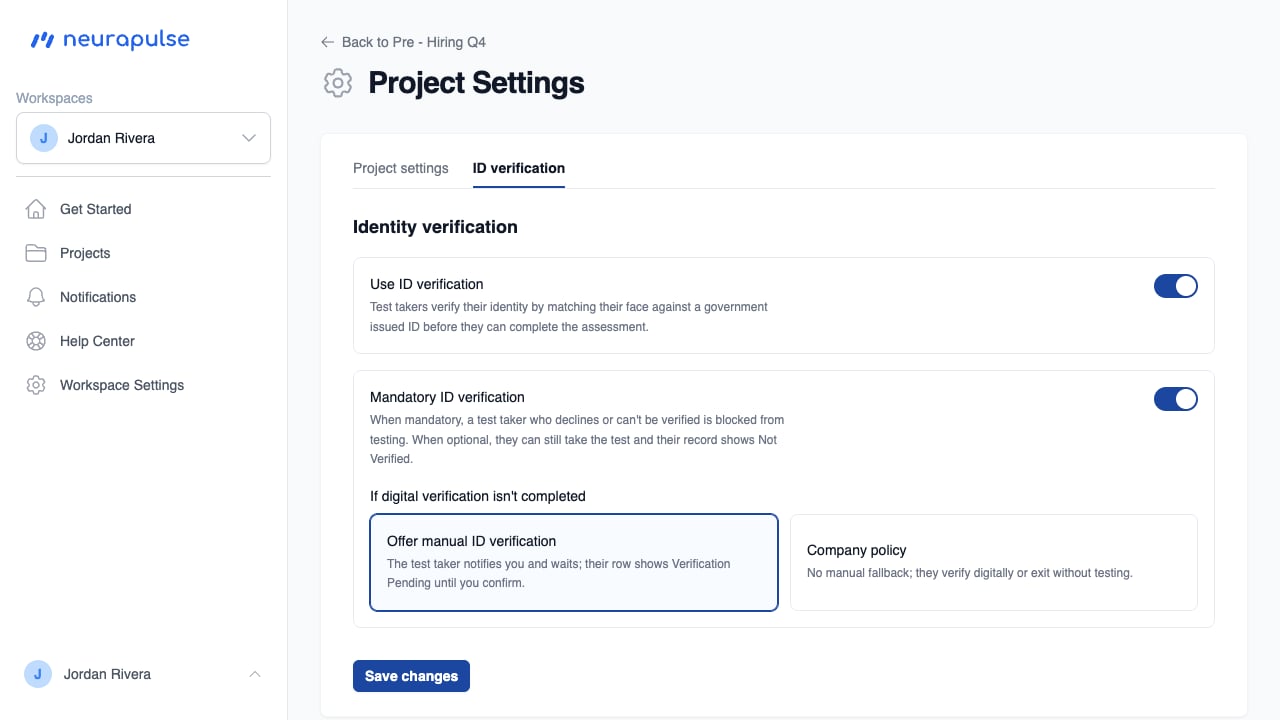
The ID verification tab controls whether test takers verify their identity
(a live face photo matched to a photo ID) before taking the assessment. You
can make it optional or mandatory, and for mandatory projects you
choose what happens when a test taker does not complete digital
verification: offer manual ID verification, or company policy with a
policy link that is shown to the test taker. See Creating a project
for the settings available at creation.
⋮ menu next to each project.
Project Dashboard
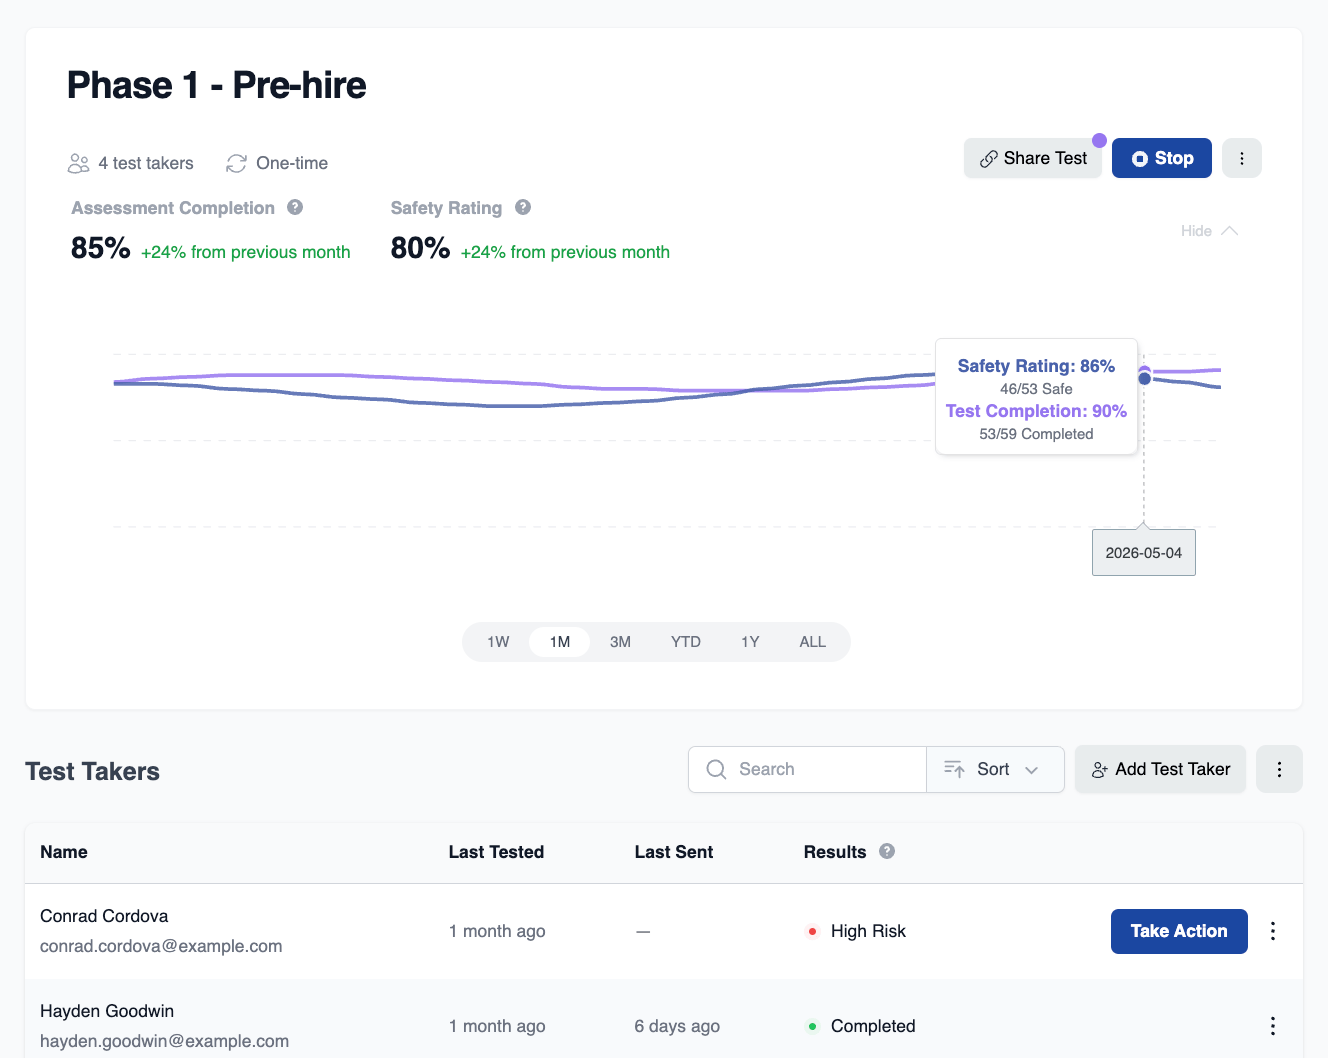
Click on a project name to access its dashboard, which includes:- Group safety metrics
- Individual results for test takers
- Test taker management options, such as editing and deleting test takers
Dashboard Metrics
- Safety Rating - The average percentage of completed assessments classified as safe over the selected period. The change shows how this average compares to the previous equivalent period.
For a 7-day period: If the average Safety Rating for the past 7 days is 85%
and it was 80% for the 7 days before that, the change would be shown as “+5%
from previous week”.
- Test Completion Rate - The average percentage of started assessments that were completed over the selected period. The change indicates how this average compares to the previous equivalent period.
For a 7-day period: If the average Assessment Completion rate for the past 7
days is 90% and it was 95% for the 7 days before that, the change would be
shown as “-5% from previous week”.
Test Takers
- View individual results
- Add individual test takers or import via CSV
- Edit/delete test takers
You can collapse/expand the chart at the top of the page to focus on
individual results (see below). The button is located below the project’s
Run/Stop button.
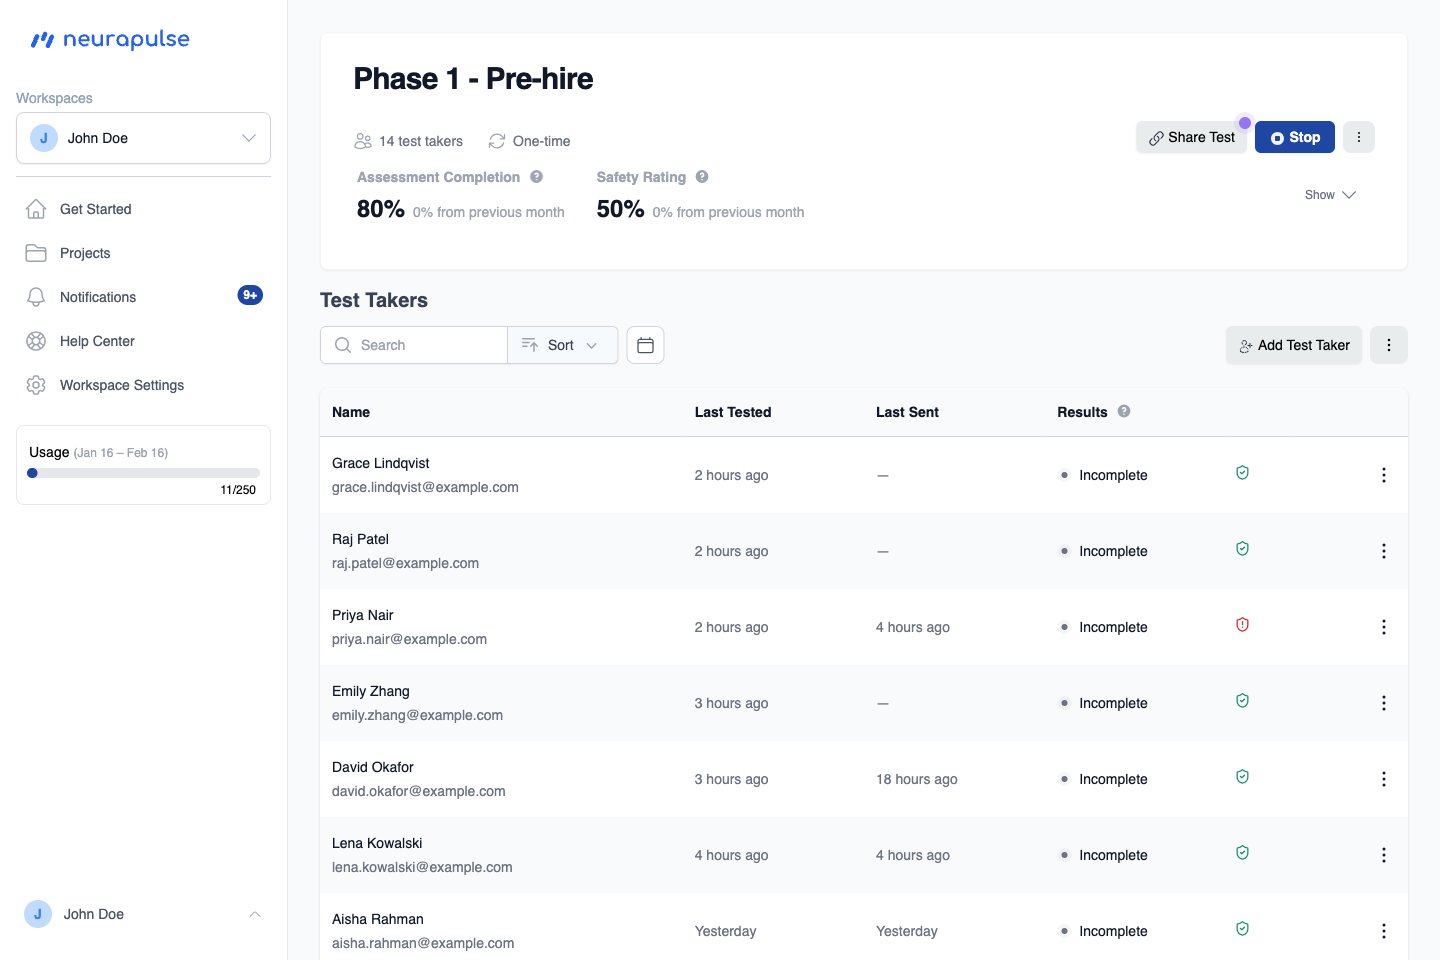
Identity Status
Each test taker row shows an ID verification status as a shield icon. Hover the icon to read the label. The statuses are:- Verified: identity confirmed, either digitally by the app or manually by a manager.
- Verification pending: a manual identity check is required before the test can proceed.
- Not verified: the test taker’s identity was not confirmed. This covers declining or continuing without verifying, and failing the ID check (for example, the selfie and ID photo, or the ID details, did not match).
- Verification off: this test taker was not asked to verify (ID verification is off for them).
- Compromised: flagged by continuous screening during the test.
A blank status means identity verification has not been attempted for this test taker yet.
Editing a Test Taker
- To edit/delete a test taker, click on the
⋮button
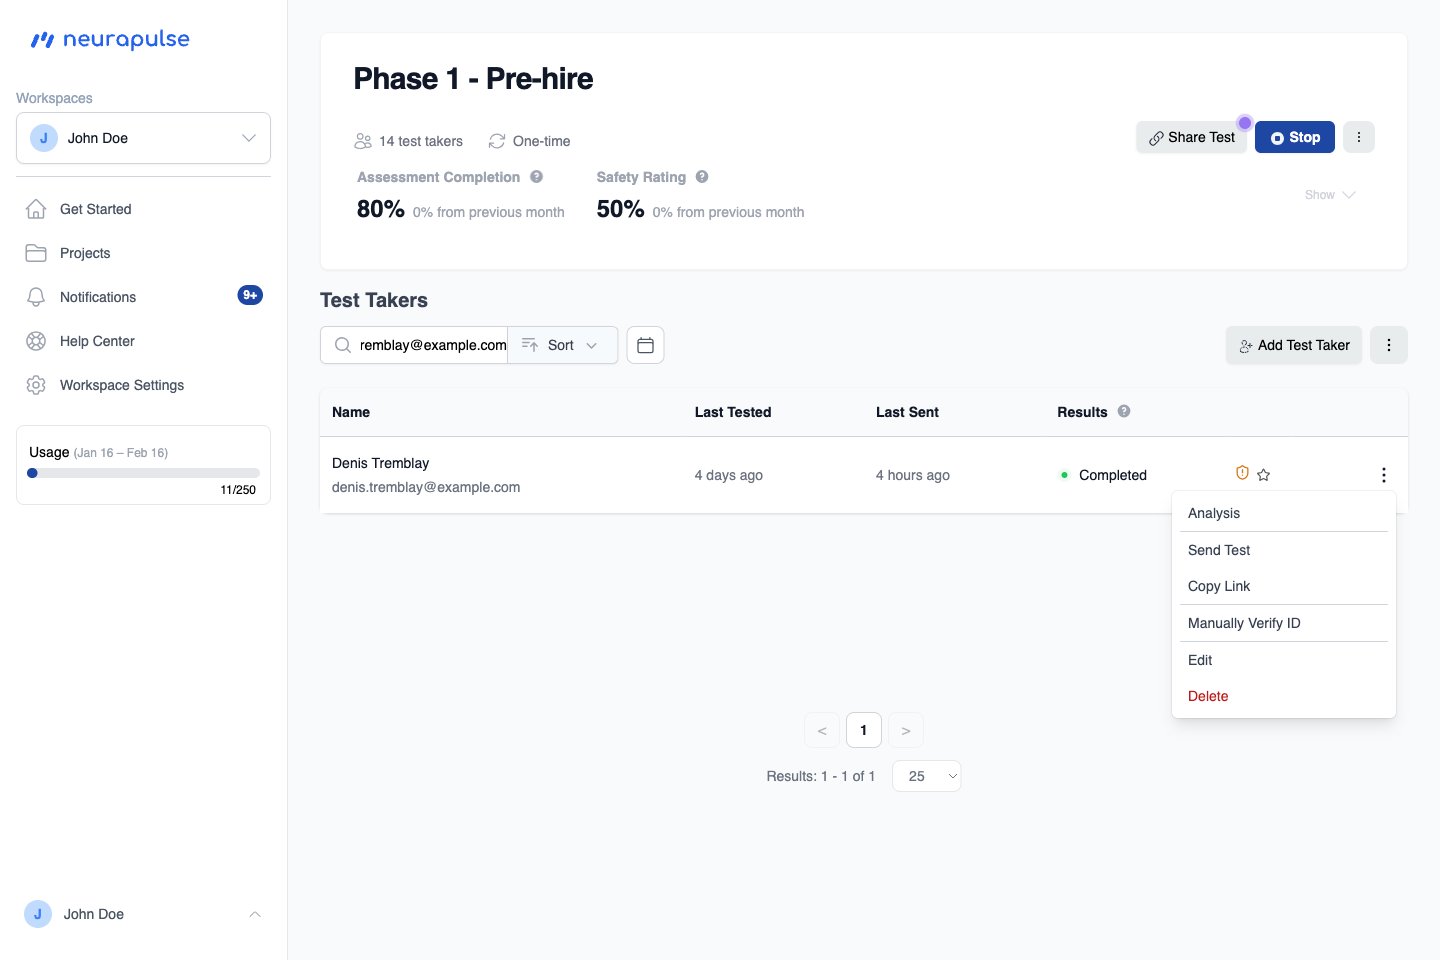
- Update the details and click the Edit Test Taker button to save changes
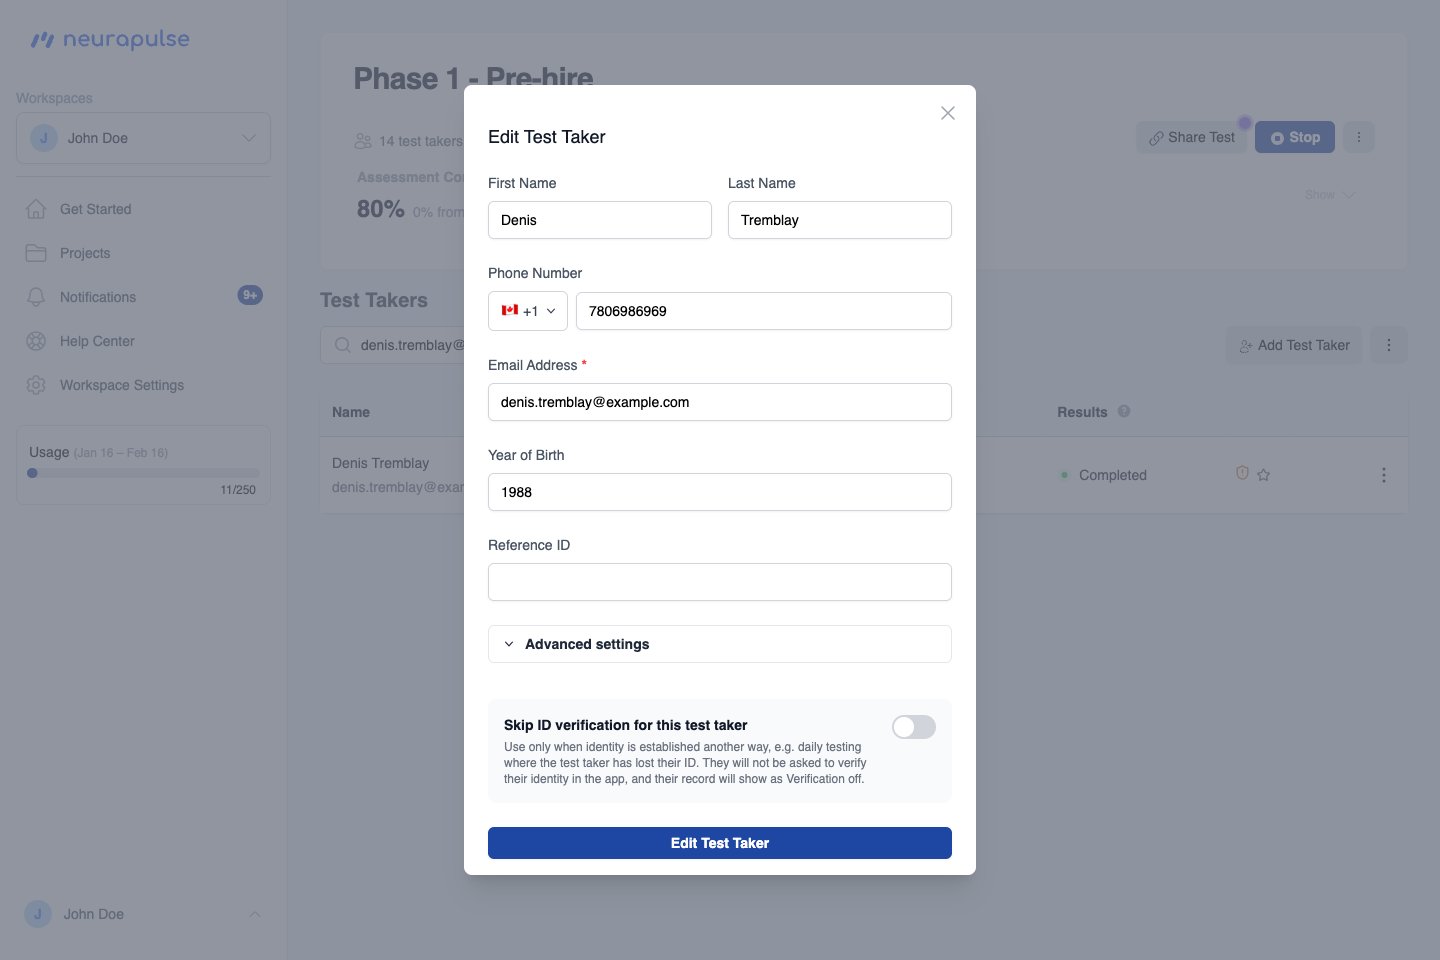
Skip ID verification for a test taker. In the Edit test taker panel, open
Advanced settings and turn on Skip ID verification for this test taker.
Use this only when identity is established another way (for example, daily
testing where the person has lost their ID). Their record then shows
Verification off, and they are not asked to verify in the app.
⋮ menu and choose Manually Verify ID.
This attests that you have confirmed their identity through an approved manual
method and sends them a fresh test. That attempt records as Verified
(manual).
Adding a single test taker
You can add one test taker at a time from the Test Takers section.- Open your project’s dashboard
- In the Test Takers section, click + Add Test Taker (at the top of the section, next to Search and Sort on desktop; above Search on smaller screens)
- Enter the required field: Email Address
- Optionally enter: First Name, Last Name, Phone Number, Year of Birth (4-digit year, e.g. 1985), and Reference ID (e.g. an employee ID)
- Click Add Test Taker to save
Importing Test Takers via CSV
You can bulk import test takers by uploading a CSV file. This is useful when adding multiple test takers at once. To import test takers, you can use either method: Method 1: Drag and Drop- Navigate to your project’s dashboard
- Drag your CSV file over the test taker table - a visual indicator will appear showing where to drop the file
- Drop the CSV file onto the table when you see the drop indicator
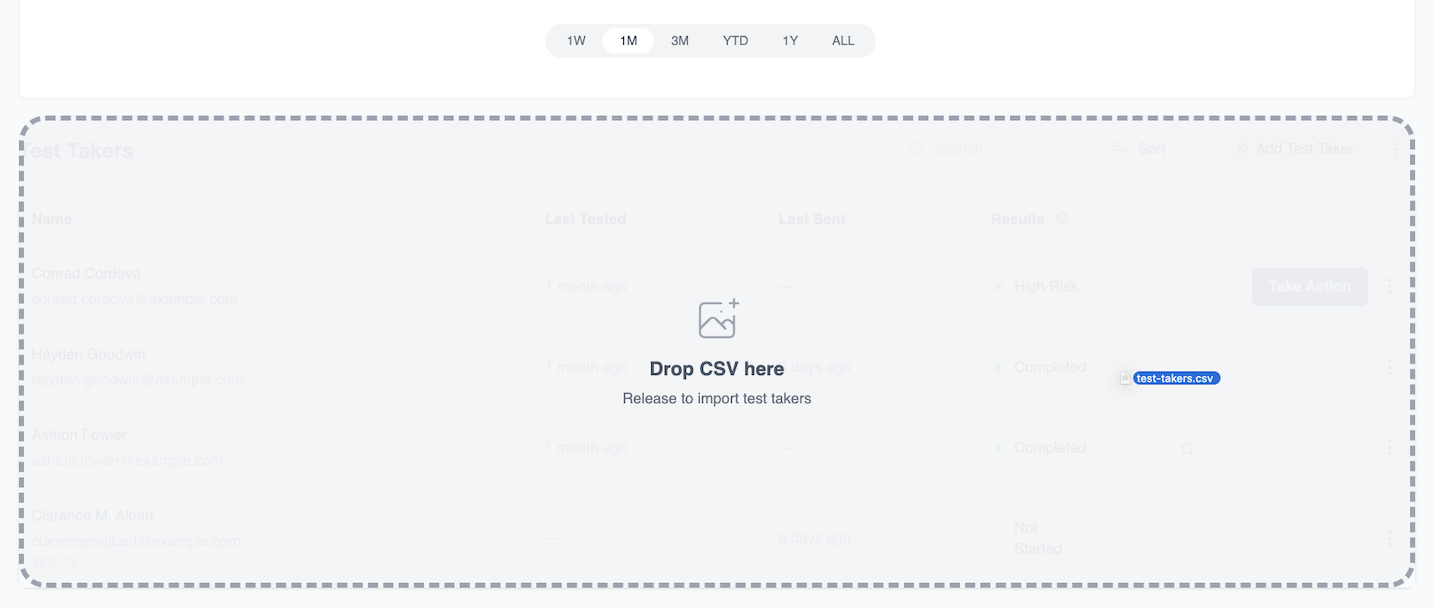
- The import preview will open automatically
- Navigate to your project’s dashboard
- Click the
⋮button in the test taker table header (located next to the search and sort controls) - Select Download CSV Template to get a sample CSV file with the correct format (if needed)
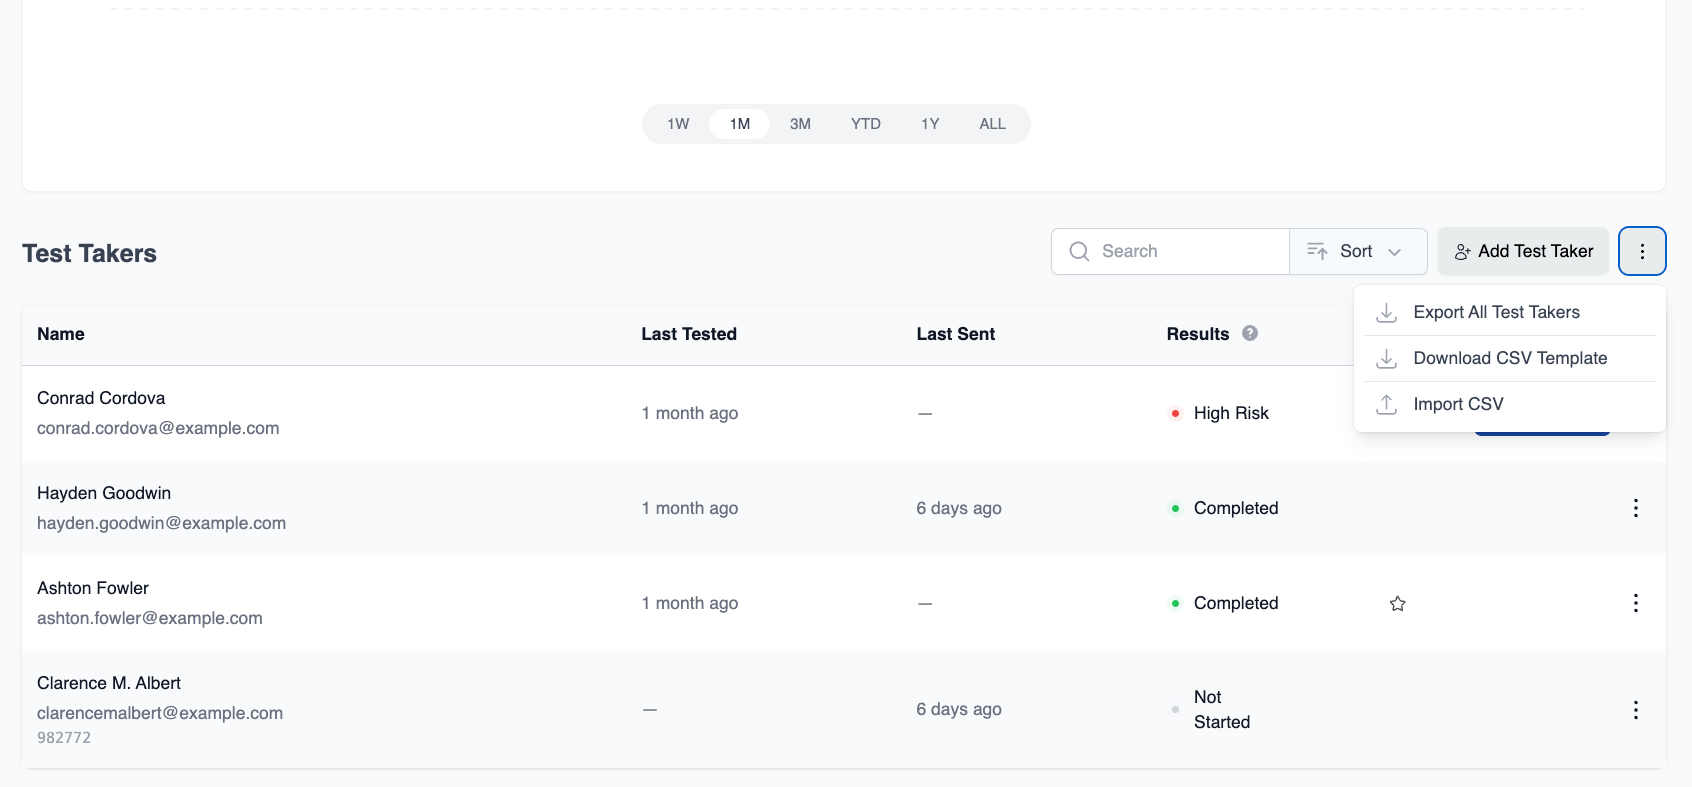
- Fill in the template with your test taker information
- Click the
⋮button again and select Import CSV - Choose your CSV file to upload
Both methods work the same way - drag and drop is a quick alternative to using
the menu button. The
⋮ button is located in the test taker table header, to
the right of the search and sort controls.- firstname (required): Test taker’s first name
- lastname (required): Test taker’s last name
- email (required): Test taker’s email address (must be a valid email)
- yearofbirth (required): Test taker’s year of birth (use 4 digits, e.g., 1985)
- referenceid (optional): An identifier for your records (like an employee ID)
Lines starting with
# are treated as comments and will be ignored during
import. The downloaded template includes helpful comments explaining each
field.- The system checks your file for errors and duplicates
- A preview window shows:
- How many test takers are ready to import
- Any errors that need to be fixed (if there are any)
- A preview of the test takers that will be added
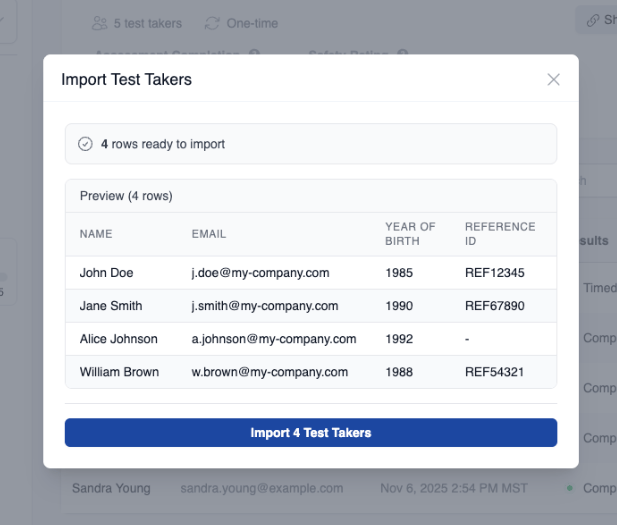
- Review the preview and click Import to add the test takers
- Use the downloaded template to make sure your file is formatted correctly
- Make sure all required fields are filled in
- Double-check that email addresses are valid
- Use 4-digit years for year of birth (e.g., 1985, not 85)
Downloading Test Takers as CSV
You can export all test takers from a project as a CSV file.- Navigate to your project’s dashboard
- Click the
⋮button in the test taker table header - Select Export All Test Takers
- A CSV file will be downloaded to your device
neurapulse_{project_name}_export_{date}_{time}.csv.
Exported fields:
- Reference ID
- Name (first and last combined), Email, Phone Number, Year of Birth
- Status (e.g. Completed, High Risk, Not Started)
- Identity Verified (Yes / No / blank, the legacy binary flag)
- Identity Status (the ID verification status:
Verified,VerificationPending,NotVerified,VerificationOff, orCompromised; blank if never attempted) - Top Performer (Yes if starred as a top performer, blank otherwise)
- Acknowledged (Yes if a High Risk result has been acknowledged, blank otherwise)
- Priority (risk priority rank used to sort the table)
- Last Sent (date the most recent test was sent to this person)
- Last Tested (date the most recent test was completed)
- Date Created
- Performance (sort order index, the row’s position when the table is sorted by performance, with 1 being the strongest performer). One-time projects only
A status indicator will appear next to the button while the export is in
progress.